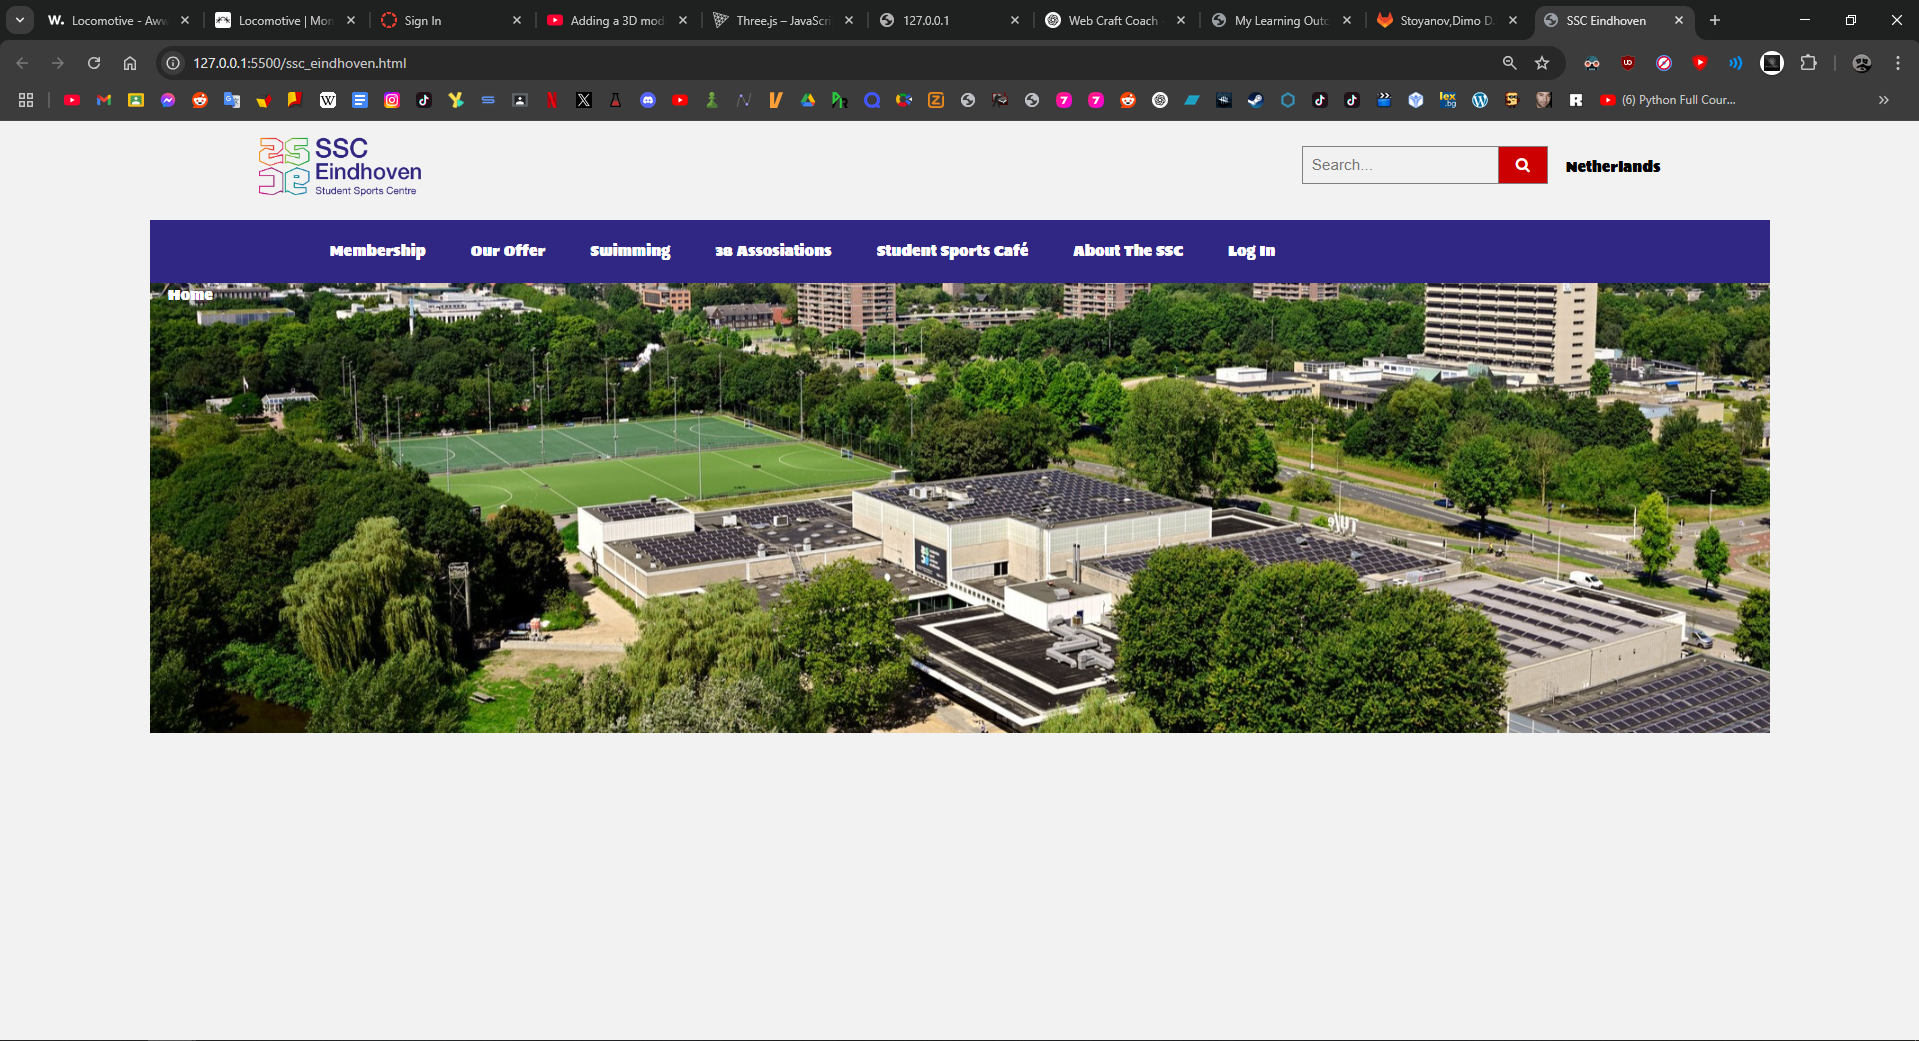
As part of a challenge given by Amer, I worked on recreating the main page of the SSC Eindhoven website as accurately as possible. The goal of this challenge was to improve my understanding of web structure, layout, and design implementation by analyzing an existing website and attempting to replicate its elements. Amer commented that my attention to layout, typography, and detail in the SSC Eindhoven recreation was good for the stage I'm at.
Self-Reflection: This challenge pushed me to pay close attention to layout structure, typography, and spacing, which are key to a professional website. It helped me better understand how different sections of a website are built and how to recreate them in a precise and functional way. Through trial and error, I gained confidence in using HTML and CSS to bring designs to life.
Locomotive.ca Website Remake
For the second challenge, I chose the Locomotive.ca website from Awwwards.com to recreate its design and interactive features. I focused on implementing a GIF background and attempting to integrate a 3D model to match the website's original interactive elements. While I successfully loaded and tested the 3D model in a separate demo webpage, I was unable to fully integrate it into the recreated version of the Locomotive.ca site. The testing environment allowed me to experiment with Three.js, positioning, and scaling the model before facing challenges with embedding it properly into the website layout. Amer noted that my willingness to experiment with GIF backgrounds and 3D elements showed strong initiative, and that even partial success with Three.js was great practice for real-world web development.
Self-Reflection: Figuring out how to implement a GIF as a background was an exciting part of this challenge, and it helped enhance the website's dynamic and engaging look. Although I didn't manage to fully integrate the 3D model into the final website, working with Three.js in a separate demo allowed me to understand how external 3D assets can be loaded, positioned, and rendered in a web environment. This experience gave me a better understanding of the technical challenges involved in working with interactive media on websites.
Branding Project for Maddie Jane
In our group branding project, we worked with a real-life client Maddie Jane, a singer looking for a visual identity that represents her as an artist. My role included designing logos and stylescapes, participating in meetings with the client, and gathering feedback to refine our designs. We also organized a photoshoot, which I worked on alongside my teammate Brandon.
Self-Reflection: Working on branding for an actual client made me understand how important it is to align design choices with a brand's mission. The client meetings were especially useful, as they helped me refine the designs based on Maddie Jane's feedback. Organizing the photoshoot also gave me a sense of how much planning and creativity go into visual storytelling.
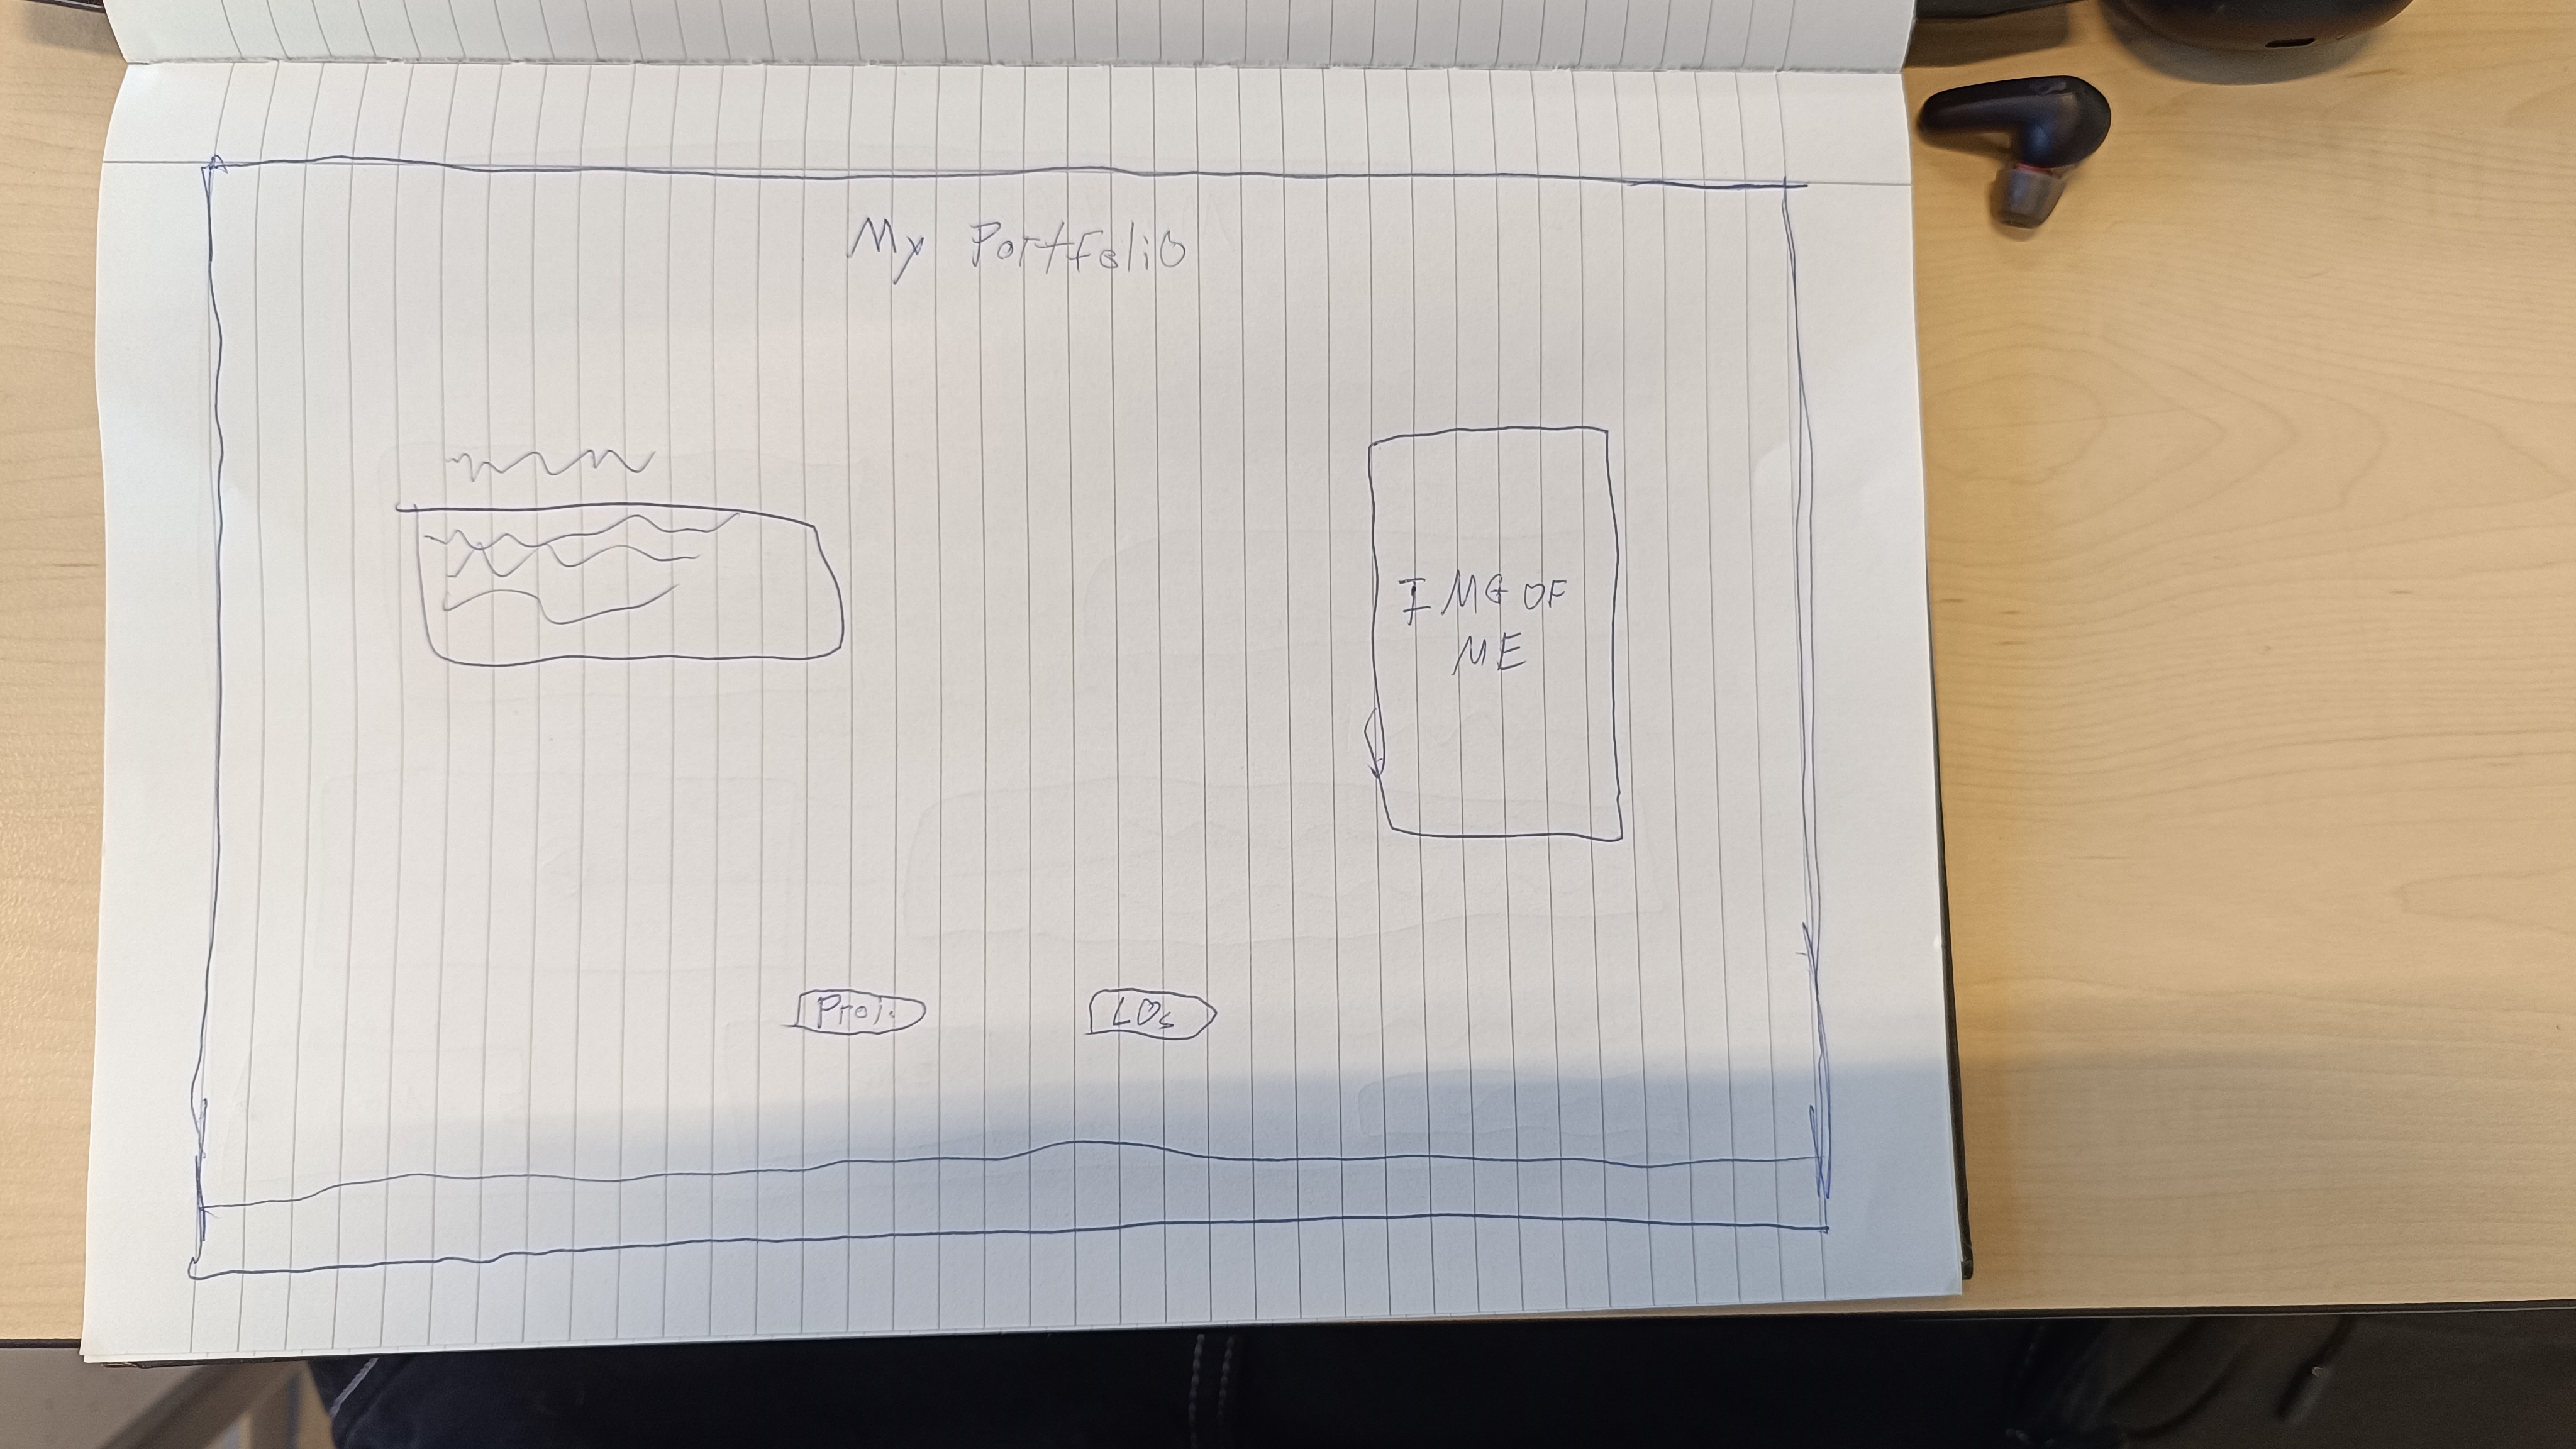
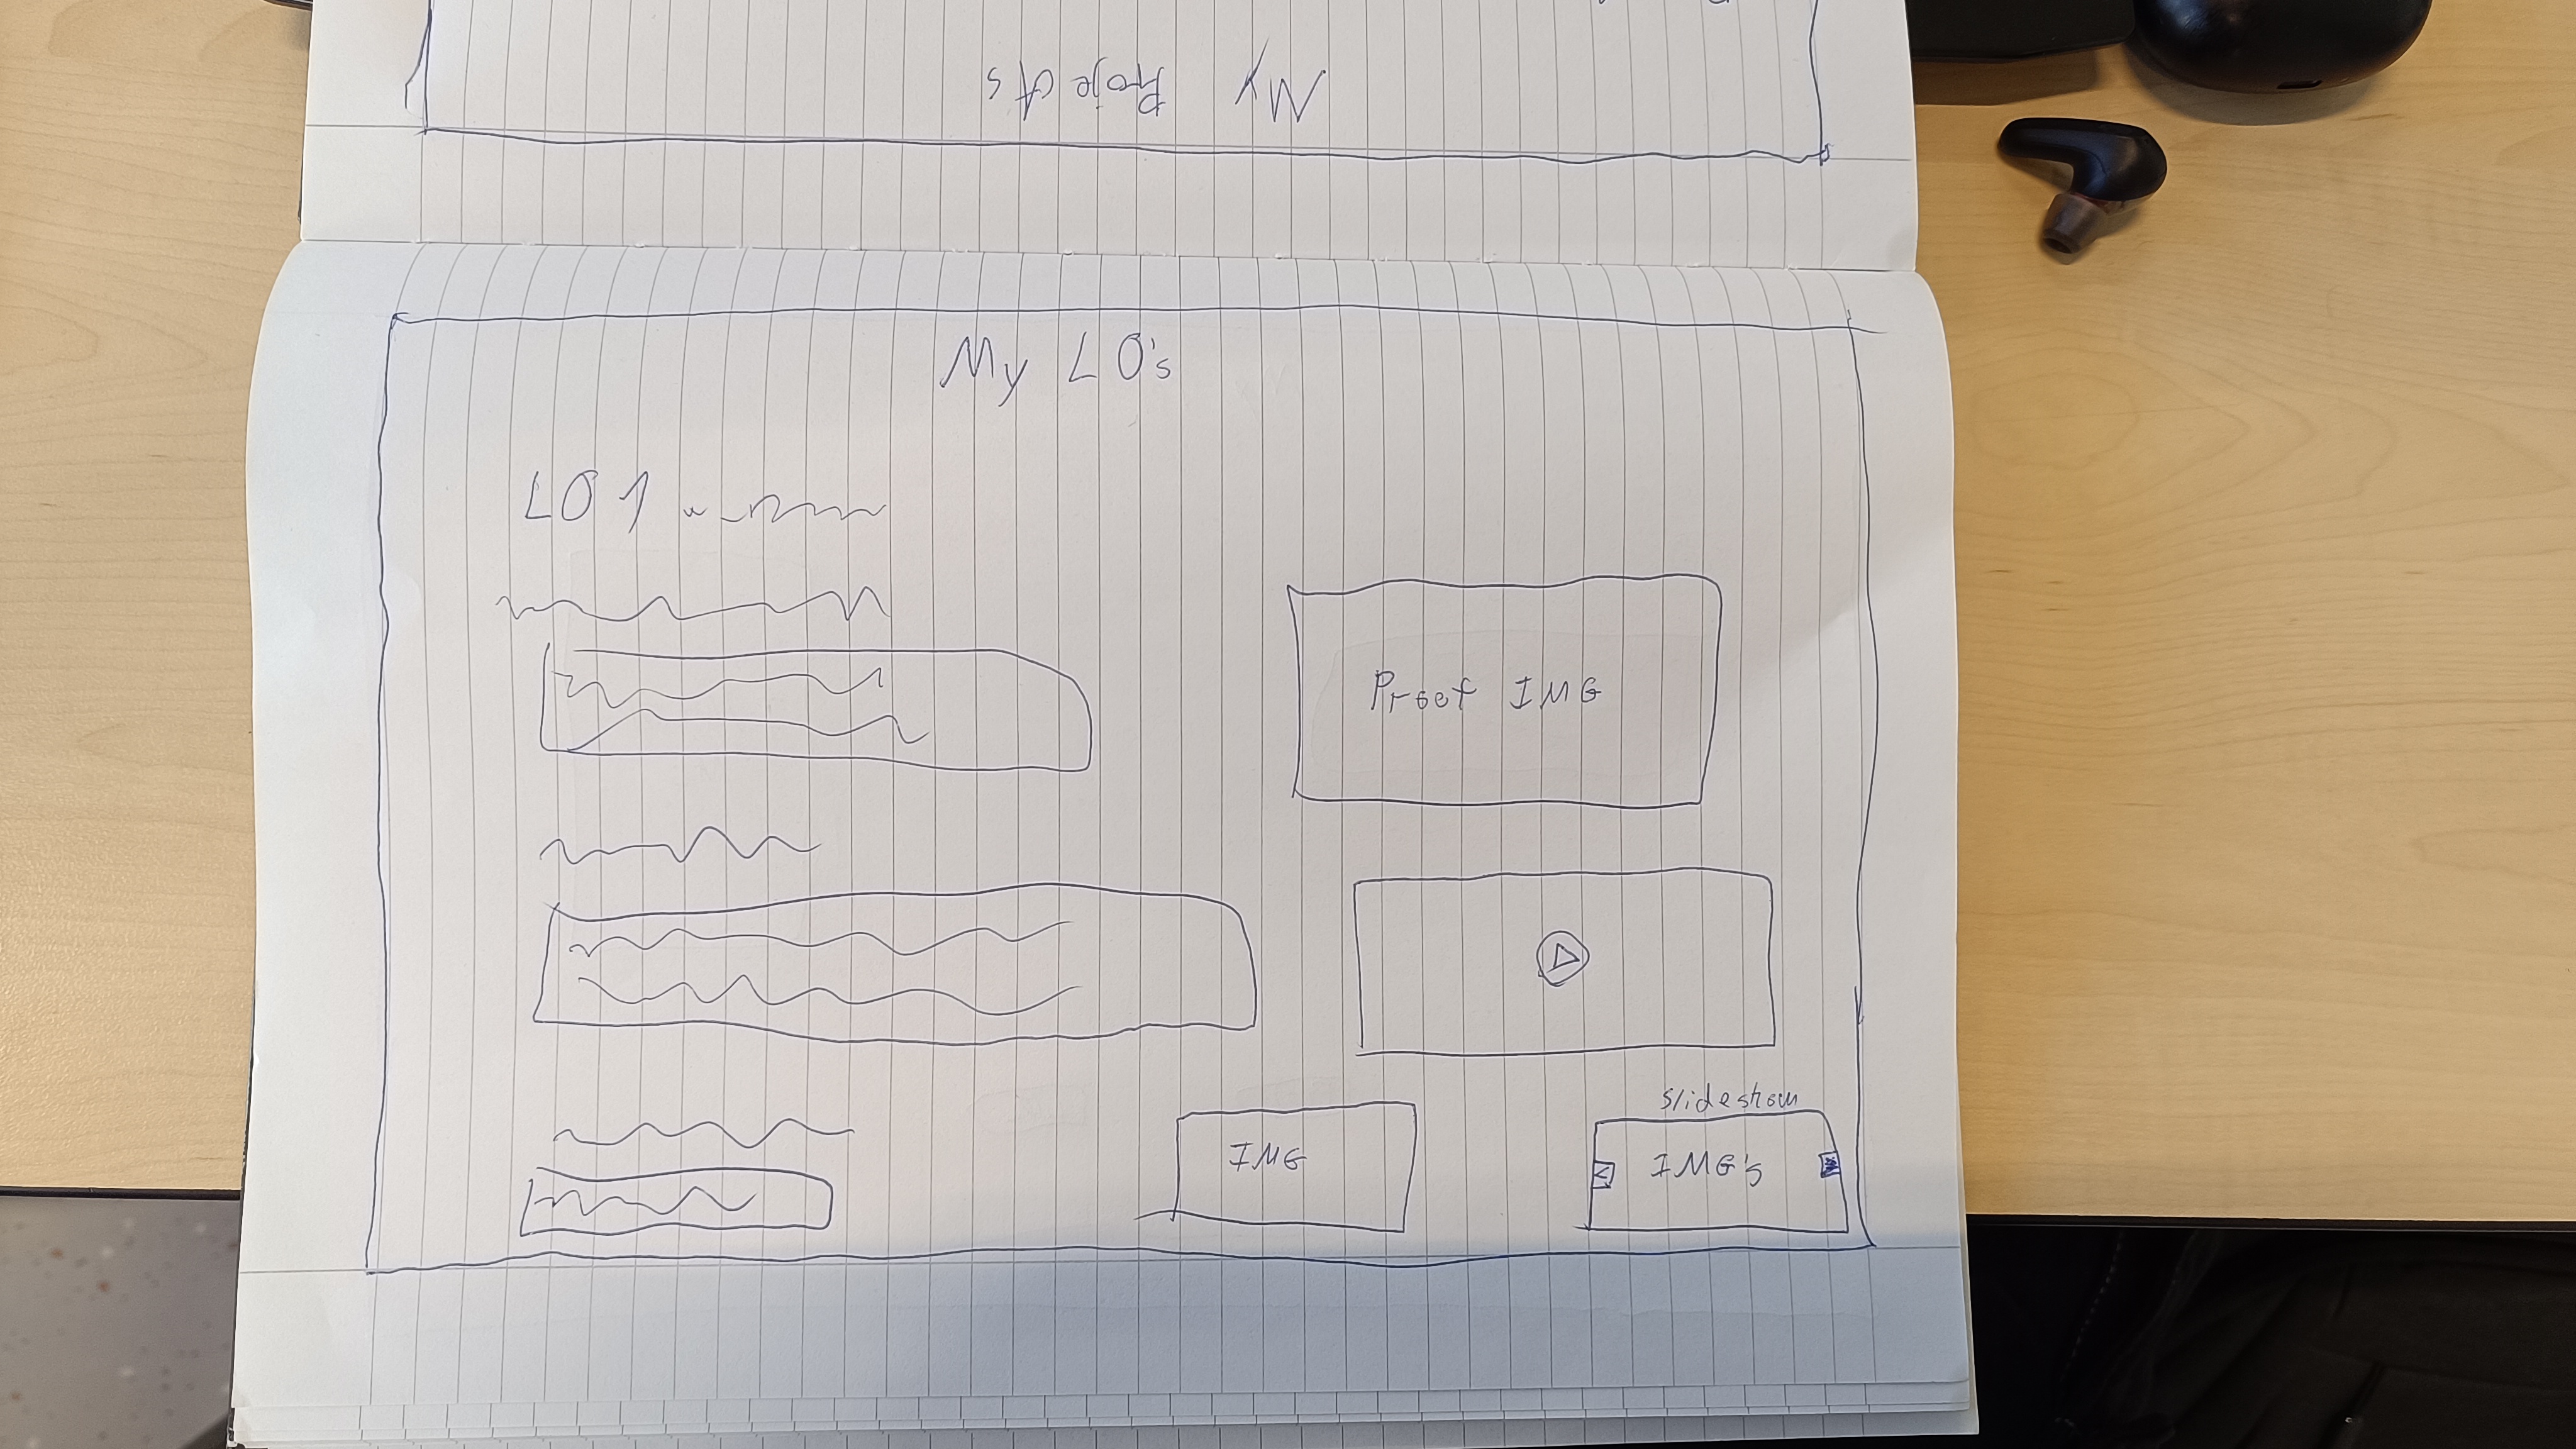
Portfolio Design Process
Throughout the semester, I worked on creating my personal portfolio. I started with paper prototypes, then created interactive Figma designs, and eventually began building the final website using HTML, CSS, and JavaScript. This project taught me how to translate design ideas
into a working product.
Self-Reflection: This was a really important part of my semester. Figuring out how to structure my site and keep the layout clean helped me understand real-world design problems. I feel more confident in my design judgment and front-end development decisions.
Flipdot Board Simulation & Development
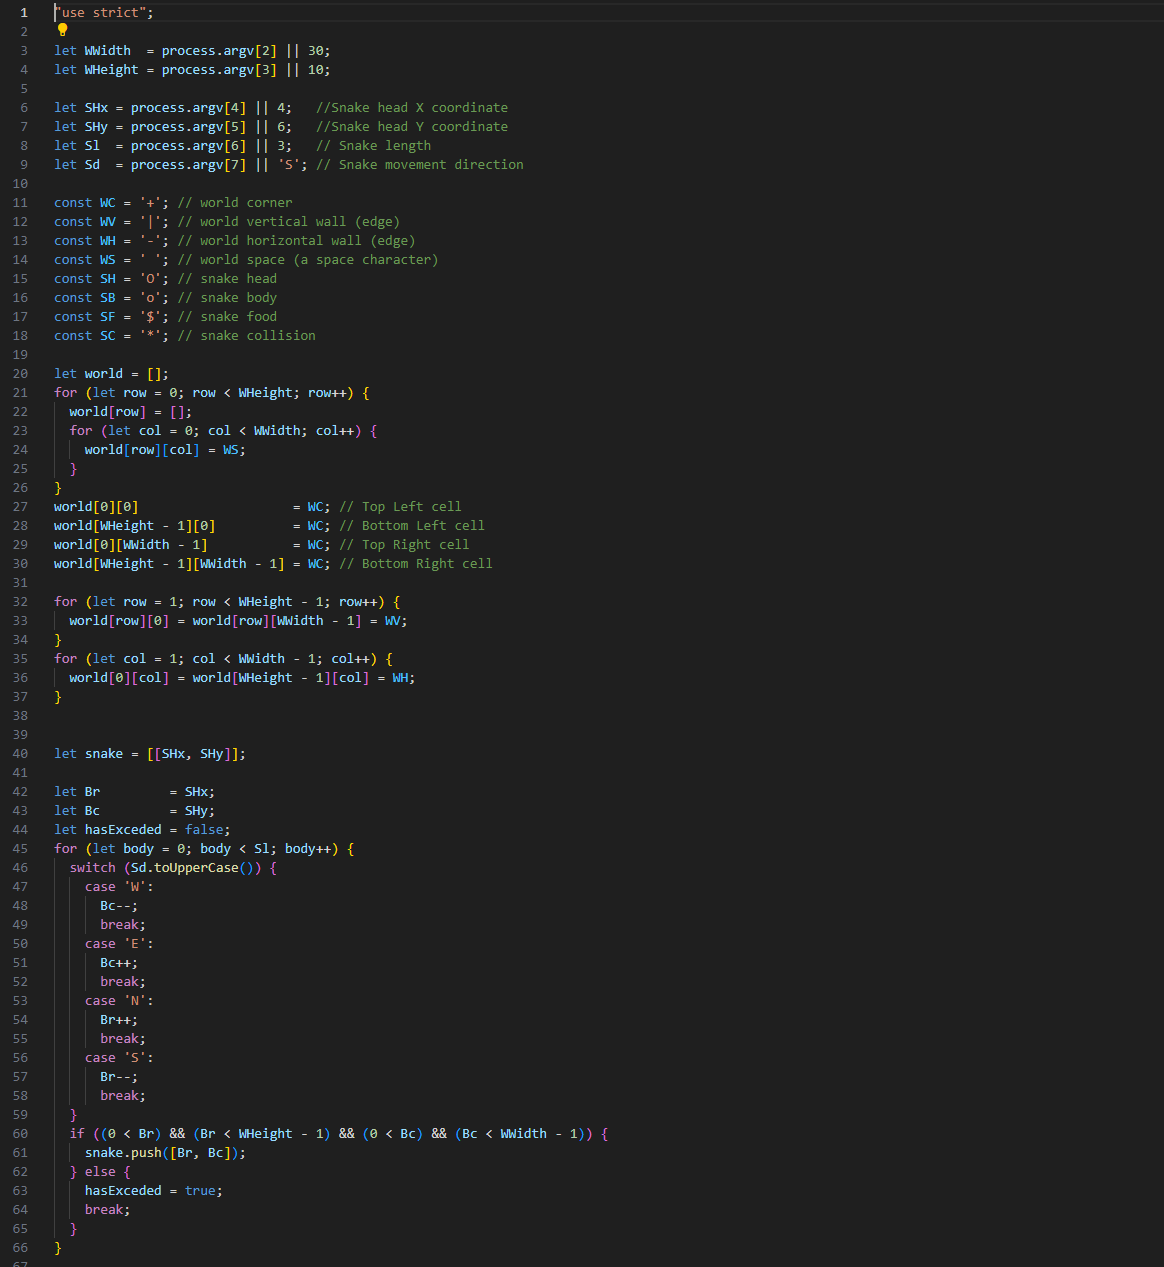
The Flipdot board projects spanned both the UX project and in the development project. For the initial UX project, our team was asked to find a fun, useful way to use a flipdot board (84x28 pixels) already present in the company. We started by brainstorming five themes: cars, space, water, something happy, office humor, and robot/AI. After discussion and voting, we focused on space, office humor, and robot/AI. My role was to simulate the board visually and design animations, including a waving robot and a spinning galaxy, to demonstrate the board's potential for creative storytelling and interaction.
Building on that, I later turned the Flipdot board into a full interactive simulation using HTML5 Canvas, JavaScript, and CSS for the development project. I expanded the original prototype with advanced features: image uploads with pixel conversion, frame-by-frame animation uploads, ripple/invert/reset functions, and custom animations. The simulator now supports drawing, erasing, text input, undo/redo, and saving/loading the board as an image. This allowed me to combine both visual design thinking and technical development in one continuous process.
Self-Reflection: These projects made me think more deeply about user interaction, technical implementation, and creative representation. Working with the board’s resolution limits forced me to carefully plan and test each animation frame-by-frame. I enjoyed experimenting visually, but also learned a lot from building the entire simulator—especially how features evolve through iteration, feedback, and teamwork.
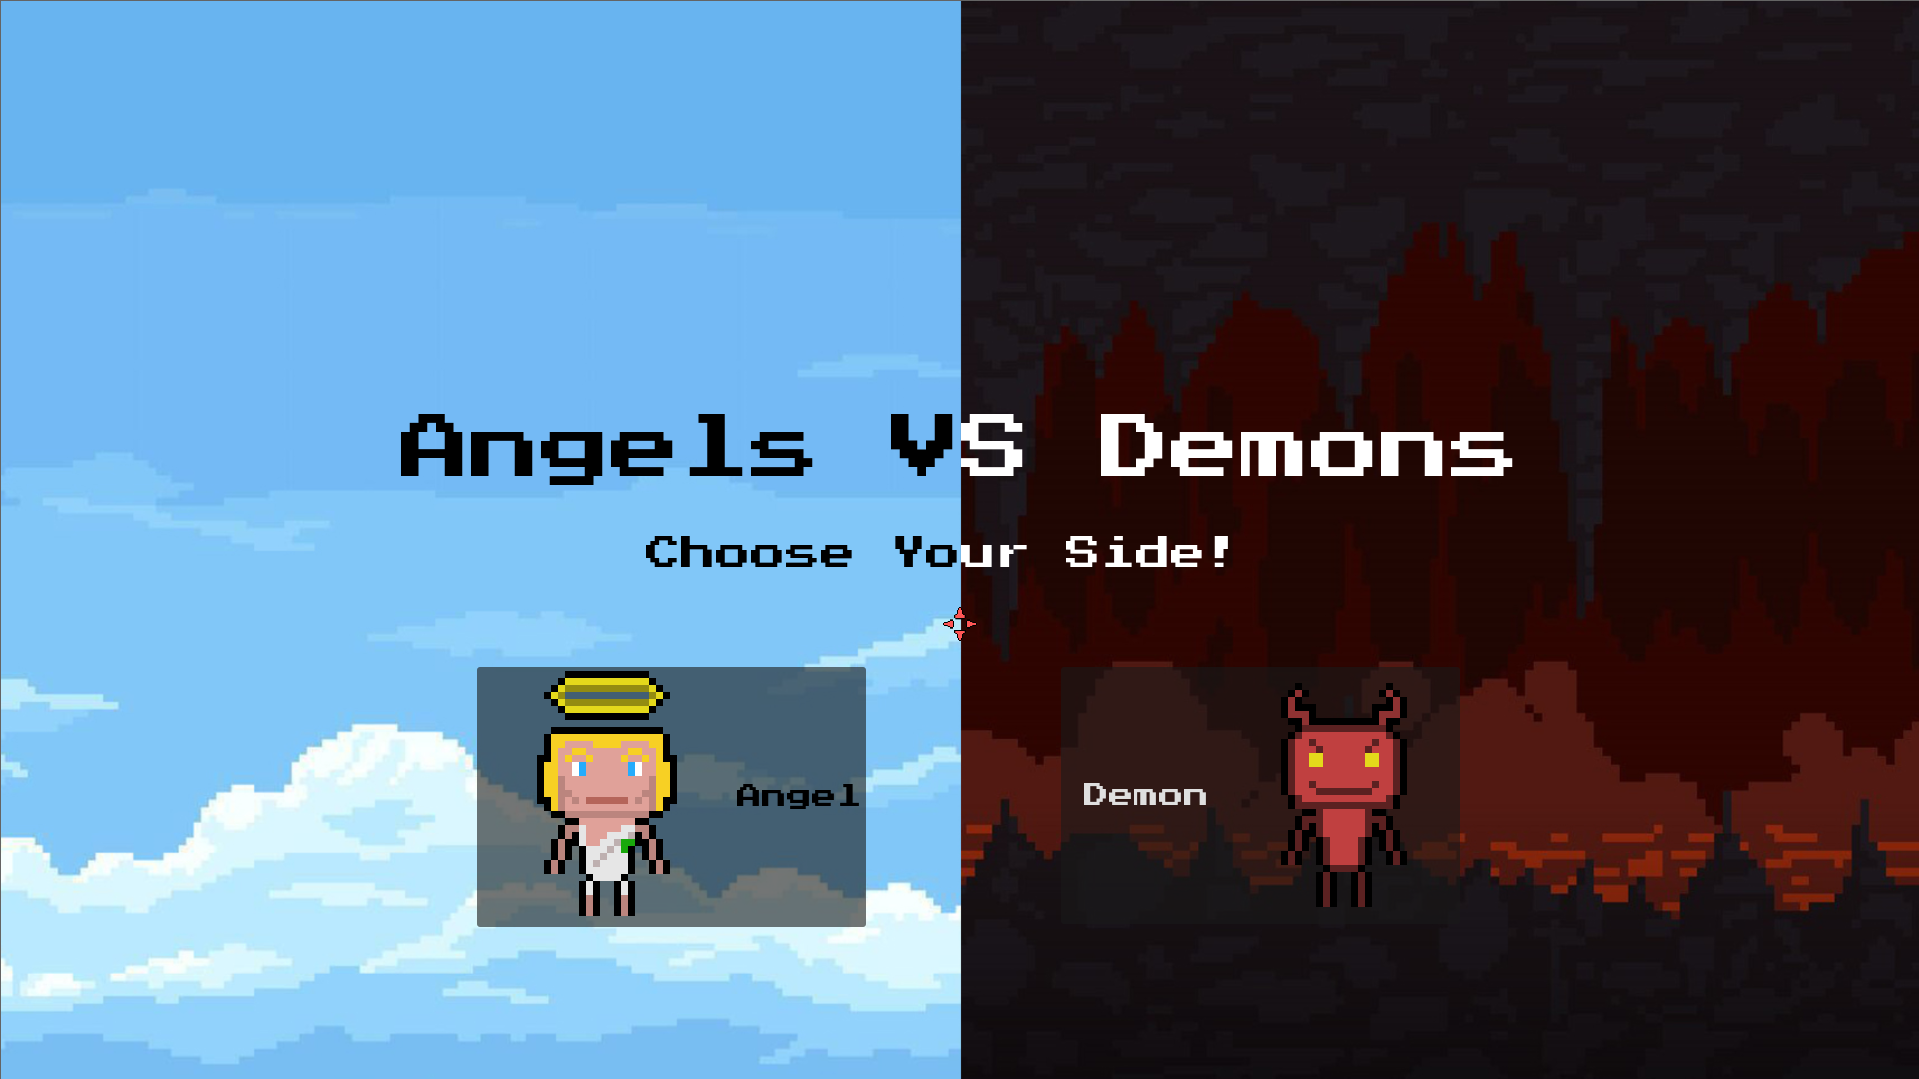
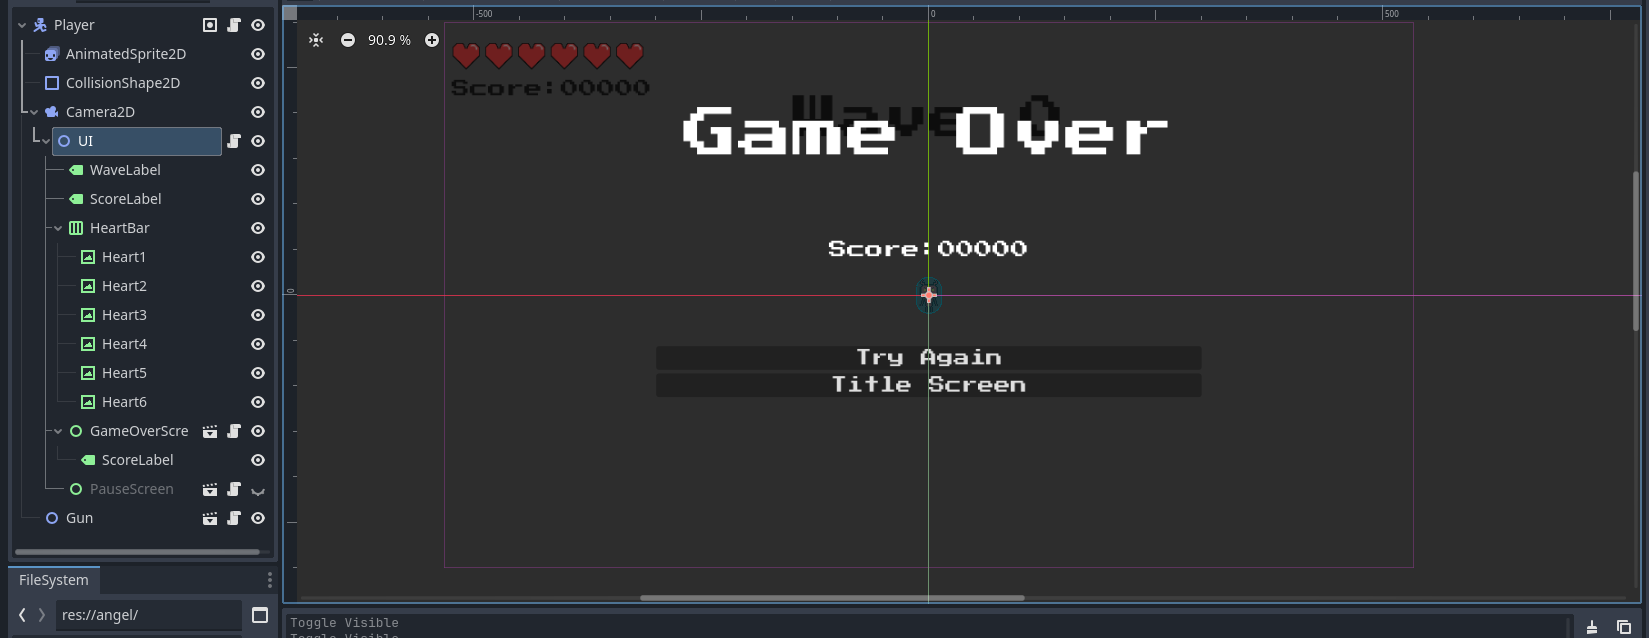
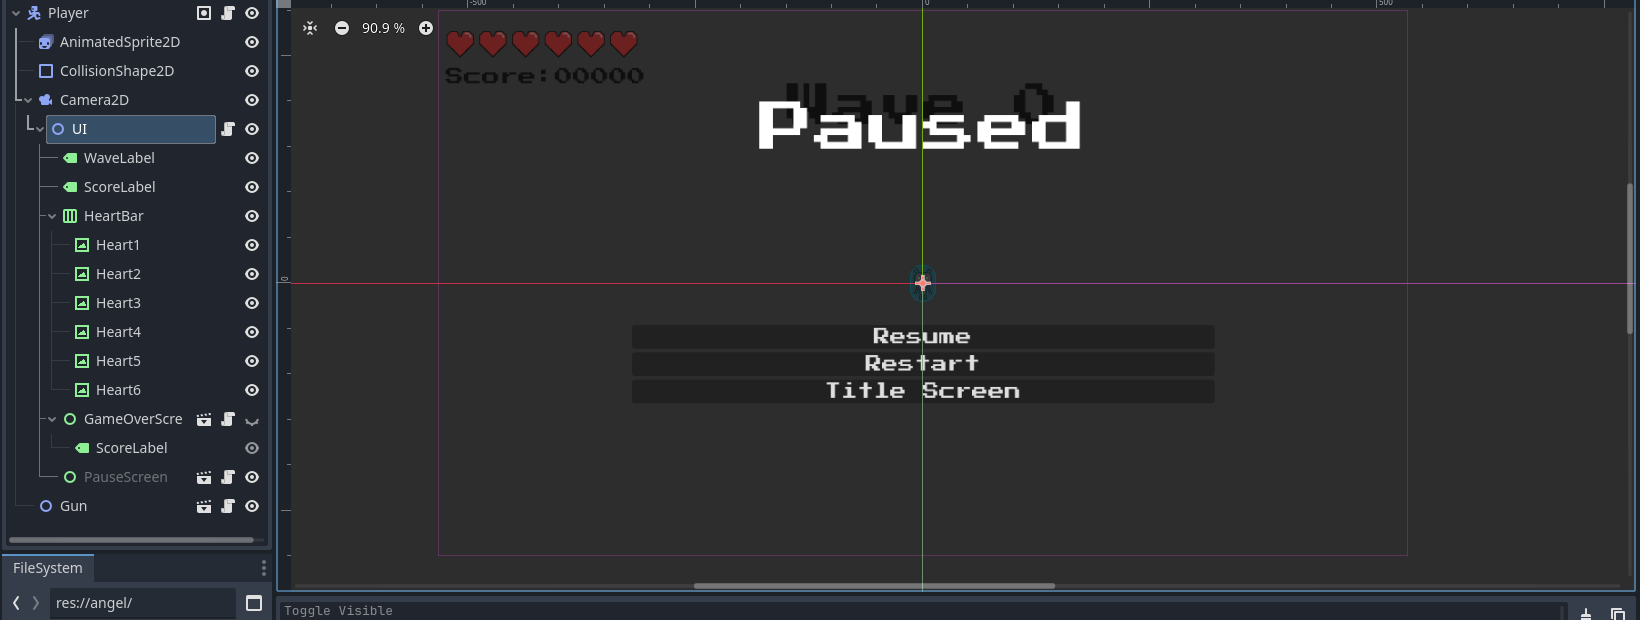
Arcade Survival Game - Interactive Media Product
For this project, I set out to create a fully playable arcade survival shooter in Godot 4, drawing on references like The Binding of Isaac and classic top-down games. My main goal was to deliver a product that felt responsive, visually engaging, and genuinely fun to interact with. I handled everything from the initial game concept, through mechanics design, enemy logic, and visual effects, to the design and placement of all UI elements. To ensure the game was enjoyable for others, I invited classmates and friends to play early builds, collecting their impressions about controls, UI, and overall challenge. This feedback was used to improve everything from the difficulty curve to visual feedback (e.g. hit flashes and wave popups). The final product is a complete interactive media experience that balances gameplay, aesthetics, and player satisfaction.
Screenshot of the game's title.
Self-Reflection:
Creating something others can enjoy and test was a big motivator for me. I realized how much a playable prototype reveals compared to just thinking about features. Getting direct user feedback pushed me to focus on polish and accessibility, like adding clear wave indicators and tuning enemy speed. I learned to see my game through a player’s eyes, not just as a developer.
SSC Eindhoven & Locomotive.ca Website Development
To develop the SSC Eindhoven and Locomotive.ca pages, I wrote HTML, CSS, and JavaScript code. I experimented with implementing different website elements, particularly GIF backgrounds and 3D models, to gain a better understanding of interactive web design.
SSC Eindhoven Website - CSS Implementation
For the SSC Eindhoven website recreation, I worked on styling the hero section, including the background image, text alignment, and button layout. This ensured that the layout looked consistent and professional while maintaining responsiveness.
/* Hero Section with Background Image */

.hero {
    background: url('/img/csm_BvOF_2024.jpg') no-repeat center center/cover;
    height: 500px;
    display: flex;
    align-items: center;
    justify-content: space-between;
    padding: 200px;
    position: relative;
}

/* Dark Overlay - Covers Left Side Only */

.overlay {
    background: rgba(48, 38, 131, 0.8);
    padding: 50px;
    color: white;
    max-width: 50%;
}
Self-Reflection: Implementing the hero section taught me how to create visually appealing layouts while keeping them functional. It was interesting to balance text placement with the background image to ensure readability and accessibility.
Locomotive.ca Website - Interactive 3D Model
For the Locomotive.ca website recreation, I worked on integrating a 3D model using Three.js. This allowed me to explore the use of external 3D assets and interactive web elements, making the design more engaging.
// --- 3D model Setup ---

import * as THREE from 'https://cdn.skypack.dev/three@0.128.0';
import { GLTFLoader } from 'https://cdn.skypack.dev/three@0.128.0/examples/jsm/loaders/GLTFLoader.js';

let scene, camera, renderer, model;

function init() {
    scene = new THREE.Scene();
    camera = new THREE.PerspectiveCamera(50, 1, 0.1, 1000);
    camera.position.set(0, 80, 50);

    renderer = new THREE.WebGLRenderer({ antialias: true, alpha: true });
    renderer.setSize(800, 800);
    document.getElementById('model-container').appendChild(renderer.domElement);

    const loader = new GLTFLoader();
    loader.load('/img/Xanax_bar.glb', (gltf) => {
        model = gltf.scene;
        model.position.set(0, 0, 0);
        model.scale.set(1, 1, 1);
        scene.add(model);
    });

    animate();
}

function animate() {
    requestAnimationFrame(animate);
    renderer.render(scene, camera);
}

init();
Self-Reflection: Integrating the 3D model gave me experience in using Three.js and handling external assets. Learning how to properly load and position the model while maintaining smooth performance was a challenge, but it helped me better understand interactive web design.
Self-Reflection: These 2 challenges were my first real dive into coding dynamic website elements. While I was already familiar with basic front-end development, working on this helped me learn how to integrate media elements like GIFs and 3D models into a web environment. Debugging was a challenge, but I learned how to troubleshoot and improve my code efficiently.
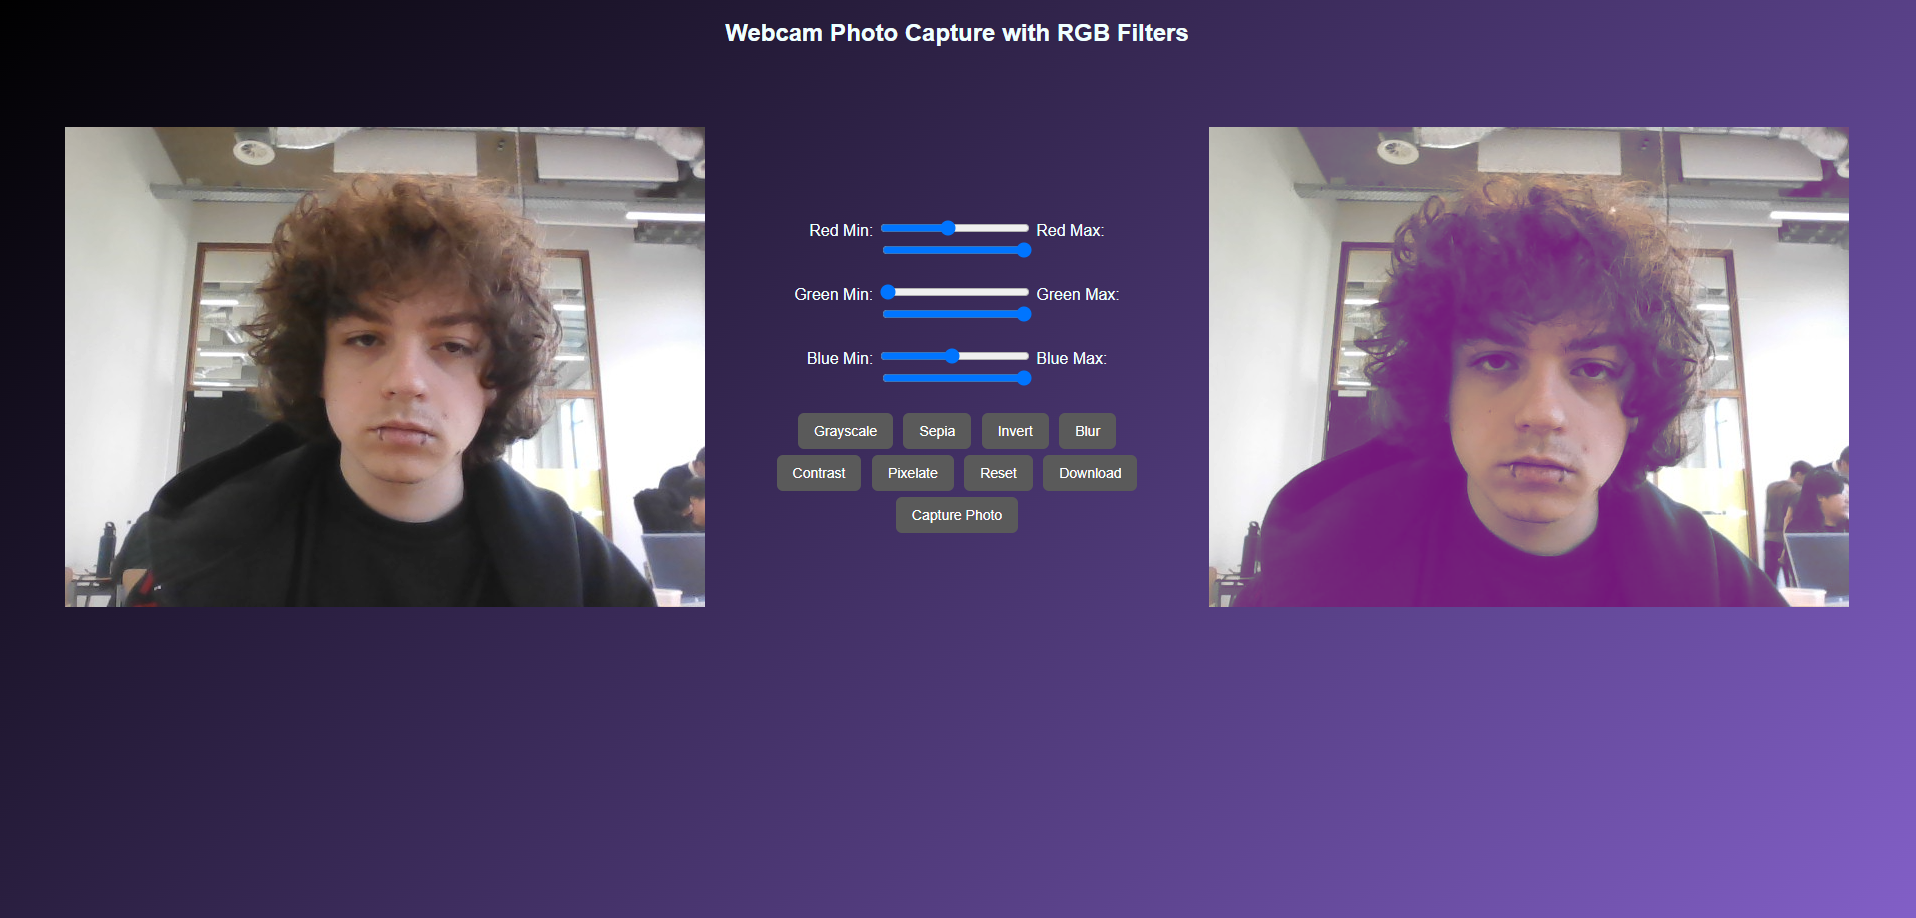
Webcam filter website JavaScript challenge
As part of my teacher Amer's coding challenges, I built a webcam photo website with filters like grayscale, sepia, blur, contrast, and pixelate. I used HTML5 media access to connect the webcam, and added a download feature to save filtered photos. This helped me improve my JavaScript skills and get hands-on with CSS filters and DOM manipulation. Amer appreciated the creativity and technical problem-solving I showed, especially how I made advanced features like live filters and download functionality work smoothly.
Self-Reflection: This exercise taught me how to turn technical code into something that feels interactive and visual. I learned how to troubleshoot issues with media permissions and filter stacking, and it helped me see how JavaScript can shape the user's experience.
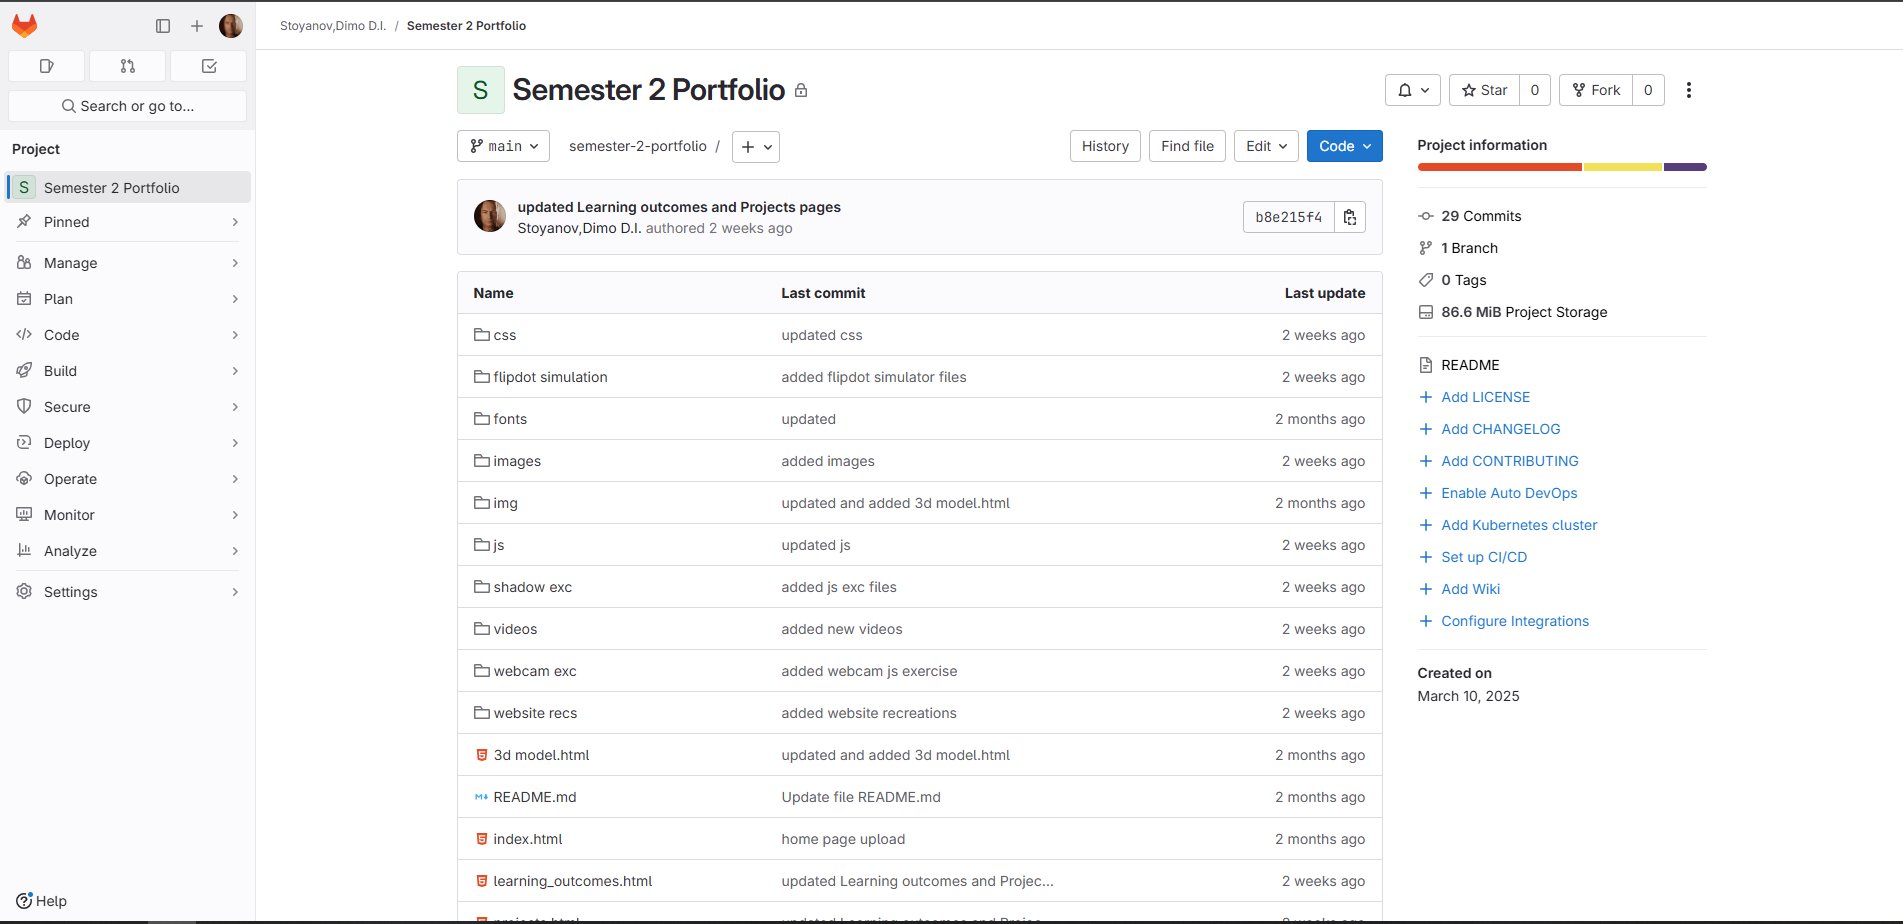
Portfolio Development Process
I built my portfolio website using HTML, CSS, and JavaScript, with a custom structure and styling. I applied responsive design principles and organized my code in a way that would support future updates and sections. Throughout development, I used VS Code as my environment and refined features like layout, collapsibles, navigation, and reusability across multiple pages. Amer pointed out that my approach to planning, responsiveness, and incremental improvements demonstrated good front-end engineering habits and a thoughtful design-to-code workflow.
For version control, I used Git to track changes and progress during development. This allowed me to experiment with updates while keeping a clean history of my work and structure. Maintaining the repository helped me better understand the value of commit history and organization in real-world development workflows.
//Collapsible function

document.addEventListener("DOMContentLoaded", function () {

    const collapsibles = document.querySelectorAll(".collapsible");

    collapsibles.forEach(button => {
        const content = button.nextElementSibling;

        if (content) content.style.display = "none";

        button.addEventListener("click", function () {
            const isActive = this.classList.toggle("active");
            if (content) {
                content.style.display = isActive ? "block" : "none";
            }
        });
    });
});
Self-Reflection: Building this portfolio from scratch taught me how important it is to plan a flexible layout, organize my code cleanly, and take small, trackable steps while developing. It made the connection between design and code more real and showed me how version control tools like Git support growth, experimentation, and iteration.
JS Filter & Interaction Design Iterations
While working on the camera filter website, I experimented with different filter combinations and adjusted the interface based on how smooth or intuitive it felt. I tested how stacked filters looked, refined the button layout, and considered how real-time effects affect the user's flow and engagement.
I also worked on a JavaScript exercise that made a shadow follow the user's mouse movement. It was a simple but expressive interaction that made the page feel more responsive and dynamic. The challenge helped me experiment with CSS variables and mouse event tracking to create subtle visual feedback.
Self-Reflection: These iterations helped me realize how much subtle design changes can influence the overall experience. I learned to trust my instincts when something felt off, and to keep testing and improving until it felt right.
Flipdot Board Development
For the Flipdot board UX project, I programmed visual effects like a waving robot, a spinning galaxy, and an image-to-pixels converter. I worked within the board's 84x28 pixel limit, using JavaScript to simulate animations, apply threshold filters, and respond to user interaction with ripple and invert effects.
Self-Reflection: This project taught me how to communicate visuals using logic. I learned how animations are built frame-by-frame, and how much thought goes into simple movements when pixels are limited. It helped me think like a designer and developer at the same time.
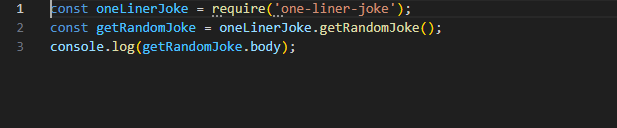
Node.js App & CLI Game Exercises
As part of Amer's coding assignments, I created a simple Node.js app using the one-liner-joke package. The project involved setting up Node.js from scratch, installing packages with npm, and experimenting with external modules to display random jokes in the console. I followed each step: initializing npm, installing dependencies, and writing a short JavaScript script to output a random joke. After this, I was encouraged to download and run another Node.js app—I picked a Snake game that ran in the terminal, giving me a real sense of how Node.js projects are structured and how dependencies and files work together in a bigger project. Amer mentioned that my initiative in setting up Node.js projects and experimenting with packages showed I was growing quickly as a developer, and praised my curiosity in exploring more advanced backend JavaScript tools.
Self-Reflection:
Building my first Node.js app from scratch taught me a lot about project setup and the ecosystem of dependencies that comes with modern JavaScript development. Running and exploring other Node.js apps, like the Snake game, helped me understand how files, folders, and modules interact. It was the first time I really saw what goes on behind the scenes in a Node.js project, which will help me build more complex projects in the future.
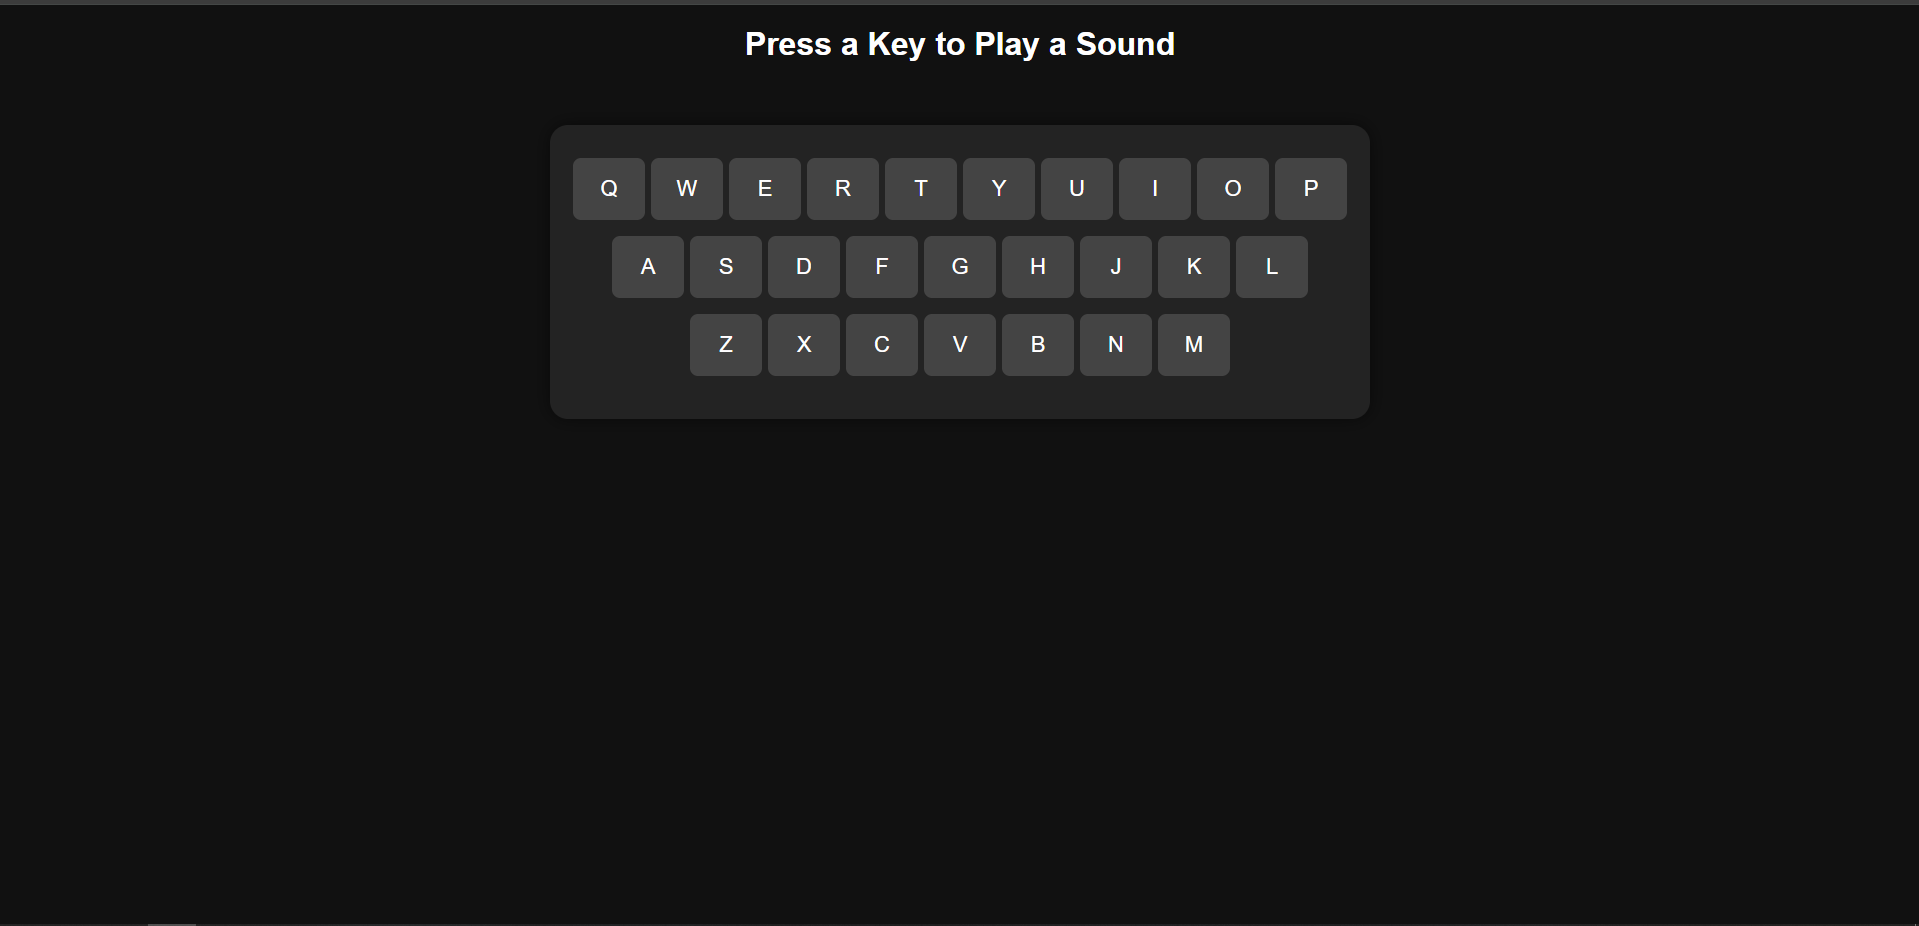
Interactive Sound Keyboard Website
Another exercise from Amer was to build an interactive sound keyboard website using HTML, CSS, and JavaScript. I set up the project with a basic keyboard interface, assigned sound files to each key, and wrote the logic to play a sound and animate the key when it was pressed. The site worked with both keyboard presses and mouse clicks, and I added my own sound choices to personalize the project. I also made sure the layout was responsive and user-friendly, experimenting with both the visual feedback and the audio response for each key.
Self-Reflection:
Building the sound keyboard showed me how to connect user input (both mouse and keyboard) to audio and UI feedback in real time. I had to test for edge cases, like multiple keys and missing sound files, which improved my debugging skills. The assignment helped me practice DOM manipulation and event handling, and I realized how even simple features can feel more interactive and fun with the right feedback and design choices.
Arcade Survival Game - Coding & Version Control
The Arcade Survival Game gave me the chance to deepen my coding skills and explore professional development workflows. I coded every feature in GDScript, using Godot’s scene and node system to keep things modular—separating logic for the player, enemies, bullets, and UI. All my code was versioned with Git, using feature branches for major changes and frequent commits to document my process. I maintained a clear commit history showing how each feature or bugfix was introduced, and I wrote descriptive commit messages to make it easy to trace my reasoning. I also hosted the project on GitHub, which allowed me to share the game for feedback and keep a backup of every step in development.
Self-Reflection:
Using version control made my workflow much safer and more organized. I could experiment without fear of breaking the main game, and it was easy to revert or review changes. I got used to writing good commit messages and realized how much clearer my own process became when I looked back through the project history. This experience also helped me practice working in a way that’s expected in the industry.
Self-Portrait & Logo Design
For one of Pieter's exercises, I created a self-portrait and a personal logo, using Adobe Illustrator to experiment with typography and branding. The goal was to explore how typography affects identity and branding.
My Self PortraitThe Logo Iteration
Self-Reflection: Creating a self-portrait and designing a logo made me think about personal branding and how typography can communicate identity. I experimented with different styles before settling on a design that best represents me. This task helped me refine my vector design skills and work more confidently in Illustrator.
Spread Design Exercise
For another exercise, I designed four spreads following specific typography constraints. The task required using a limited number of letters and words to create visually balanced pages.
The Final Result of The Exercise
Self-Reflection: This exercise helped me develop a stronger sense of layout composition and how typography interacts with space. I learned how to make text visually appealing while keeping the design clean and balanced. Limiting the number of words forced me to think about how to use typography creatively.
Maddie Jane Logo Development & Iteration
For the branding project, I designed multiple logo variations for Maddie Jane. After presenting the initial concepts in our client meetings, I made adjustments based on her feedback. This involved refining typography, color choices, and layout, ensuring that the final logo aligned with her artistic identity.
Self-Reflection: The process of revising and refining the logo designs based on real client feedback was eye-opening. It made me realize how important it is to stay flexible and be willing to change things, even if I initially liked my first drafts. I learned that every adjustment—whether in font style, spacing, or color—plays a crucial role in making a logo feel more professional and cohesive with a brand's identity. This project also reinforced the importance of documentation and version control, as I kept track of all logo versions to show how the design evolved.
Branding for Maddie Jane (Logos & Stylescapes)
I worked on multiple iterations of logos and stylescapes for Maddie Jane based on her feedback from our meetings. After receiving feedback, I refined the designs to better match her artistic identity and vision.
Self-Reflection: This branding project reinforced the importance of iteration in design. Seeing how small changes affected the overall feel of a logo made me more aware of design choices. I learned that client feedback is crucial, and the design process isn't just about what I think looks good—it's about what communicates the right message.
Flipdot Group UX Project & Animation Testing
As part of a collaborative UX project, our team was challenged to find creative uses for an 84x28 flipdot display. We started by brainstorming five possible themes—cars, space, water, something happy, office humor, and robot/AI—and ultimately focused on space, office humor, and robot/AI as the most promising directions. My main responsibility was designing the visual logic and interactivity for the robot and space concepts, which included developing and testing a range of animations for the board.
During development, I experimented with frame-by-frame robot animation, ripple effects, text-based input, and other interactive visuals. Each effect was refined through trial and error, especially due to the unique 84x28 pixel limitation of the display. As a team, we presented our ideas and technical approach in a group presentation, focusing on both creative storytelling and technical execution.
Self-Reflection:
Working on this project highlighted the importance of communication, task division, and collaborative problem solving. I became much more confident in sharing ideas and taking initiative when building interactive logic. The animation process itself was a real challenge, requiring constant adjustments to timing, layout, and logic to make everything feel natural on such a small display. This taught me to see animation as a process of continuous tweaking and visual feedback—and gave me a deeper appreciation for the technical and creative aspects of digital prototyping.
Interactive Animation Exercise
As part of a design exercise from Pieter, I created a simple interactive animation to explore the basics of motion, interactivity, and visual storytelling. The goal was to experiment with non-static digital content and understand how even basic animations can influence how a user experiences a screen. I focused on creating a composition that responds visually to user interaction, using JavaScript, shapes, and movement to bring the screen to life.
Video of the animation
Self-Reflection: This exercise helped me break away from static visuals and start thinking in terms of flow and feedback. Even though the animation was simple, I started to understand how movement and timing add meaning and engagement. It encouraged me to experiment more with interactive visuals and better understand the relationship between design and user input.
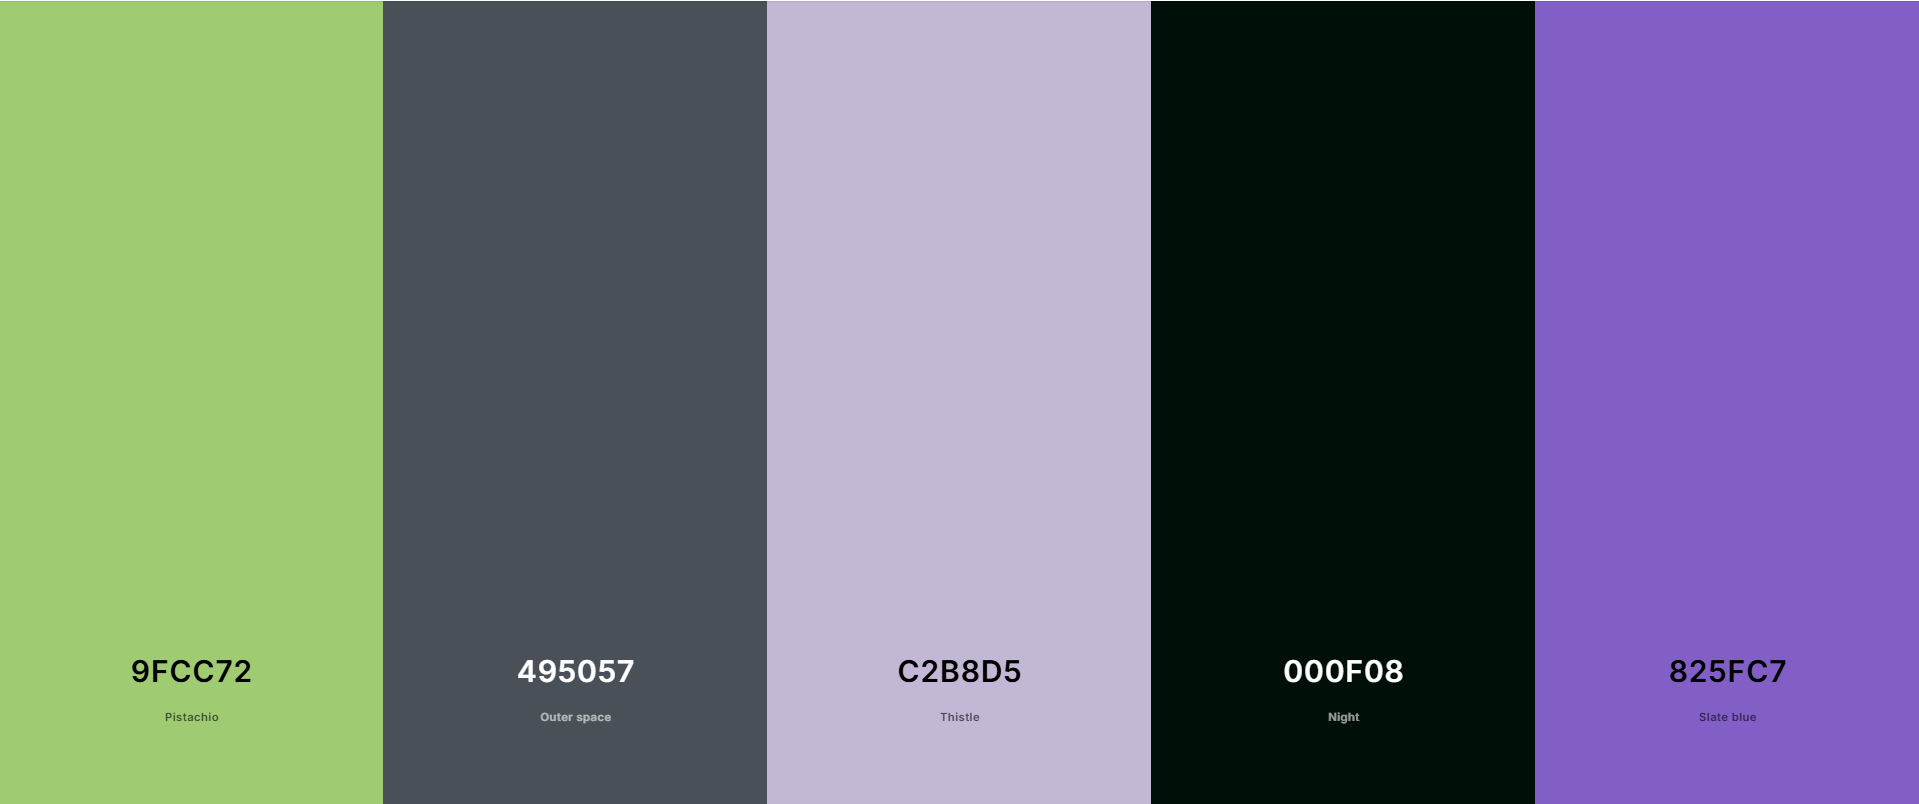
Portfolio Visual Design Choices
While building my portfolio, I revisited spacing, color palette, and text length to make the layout easier to follow. I started with a Figma prototype and translated the structure into code, but still had to iterate when things didn't look or feel right in the browser.
The Portfolio's color pallete
Self-Reflection: This showed me that design tools are just the start. Real iteration happens when you start building, testing, and making changes to improve clarity.
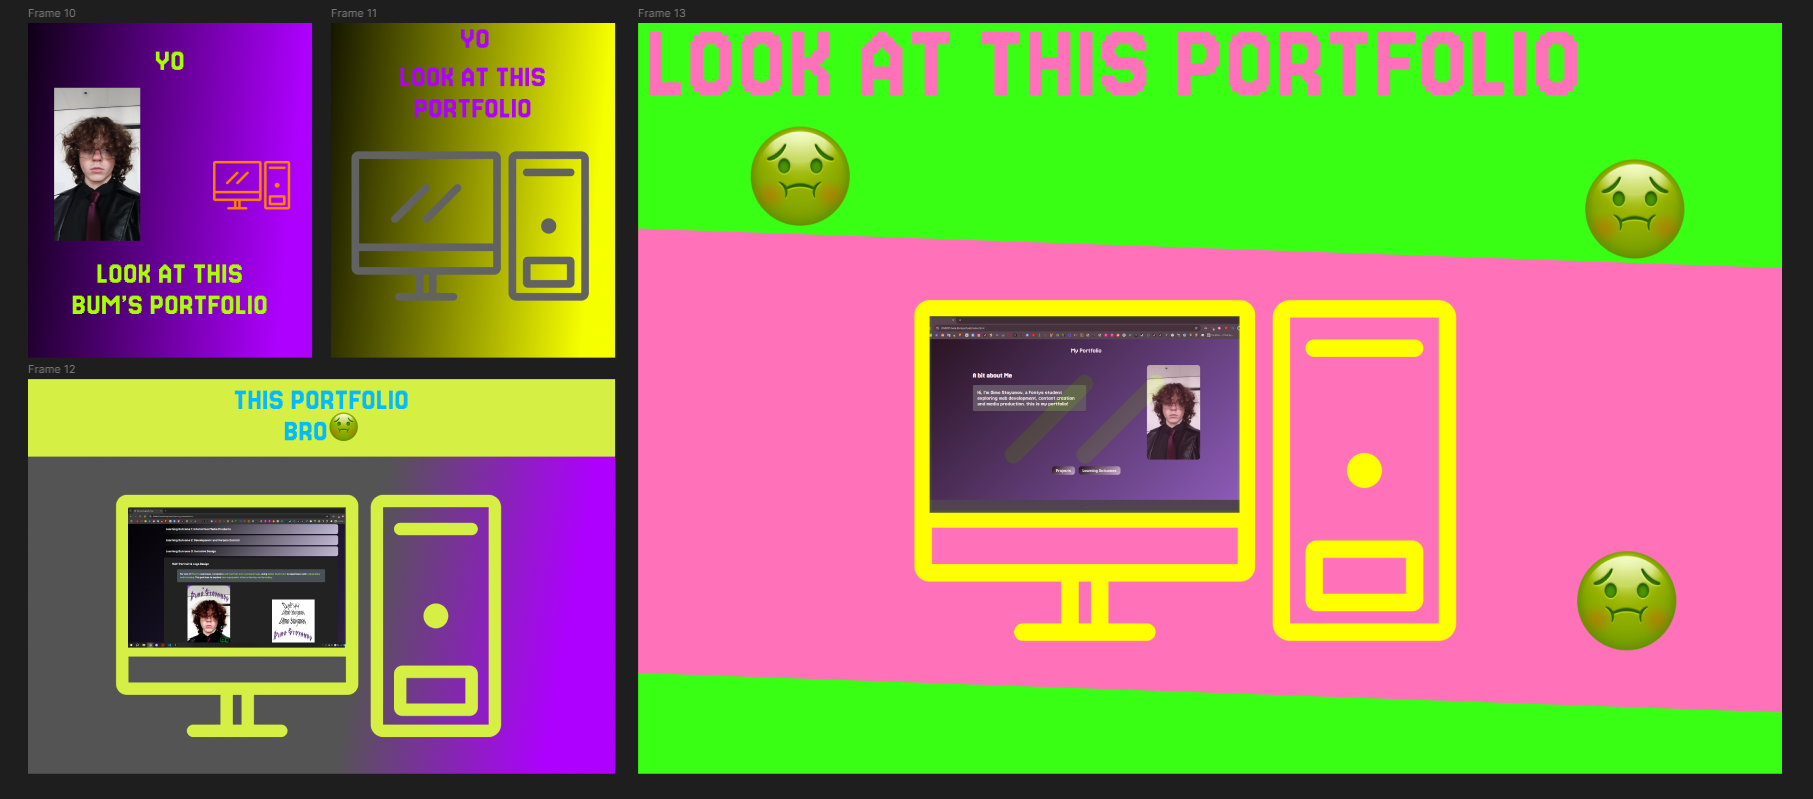
Color Theory “Ugliest Combination” Exercise
For one of Pieter's latest exercises, we were asked to intentionally create the ugliest color combinations possible in frames that could advertise our portfolios. I created four unique iterations, each experimenting with clashing hues, garish contrasts, and bold mismatches. The challenge was to push my sense of color outside of what’s “nice” and see how attention, energy, and discomfort can be used as a tool in visual communication.
Four ugly color frame iterations for portfolio advertising
Self-Reflection:
This was a surprisingly fun exercise. Deliberately making something “ugly” forced me to think about why certain colors clash and how our brains respond to color combinations. It helped me see the emotional side of color theory, and now I’m more comfortable experimenting with palettes, even if it risks “breaking the rules.”
Portfolio Brochure/Pamphlet Exercise
Another assignment from Pieter was to create a brochure or pamphlet to advertise my portfolio. I designed a single-page pamphlet that quickly summarizes my skills, design focus, and personality, using visual hierarchy and layout to make the content easy to scan and remember.
My advertising pamphlet for the portfolio
Self-Reflection:
Making the pamphlet taught me a lot about visual hierarchy and the importance of concise messaging. I tried to strike a balance between showing personality and keeping things clear and readable. This helped me realize how important first impressions are in design, and how much you can say with just a few words and bold visuals.
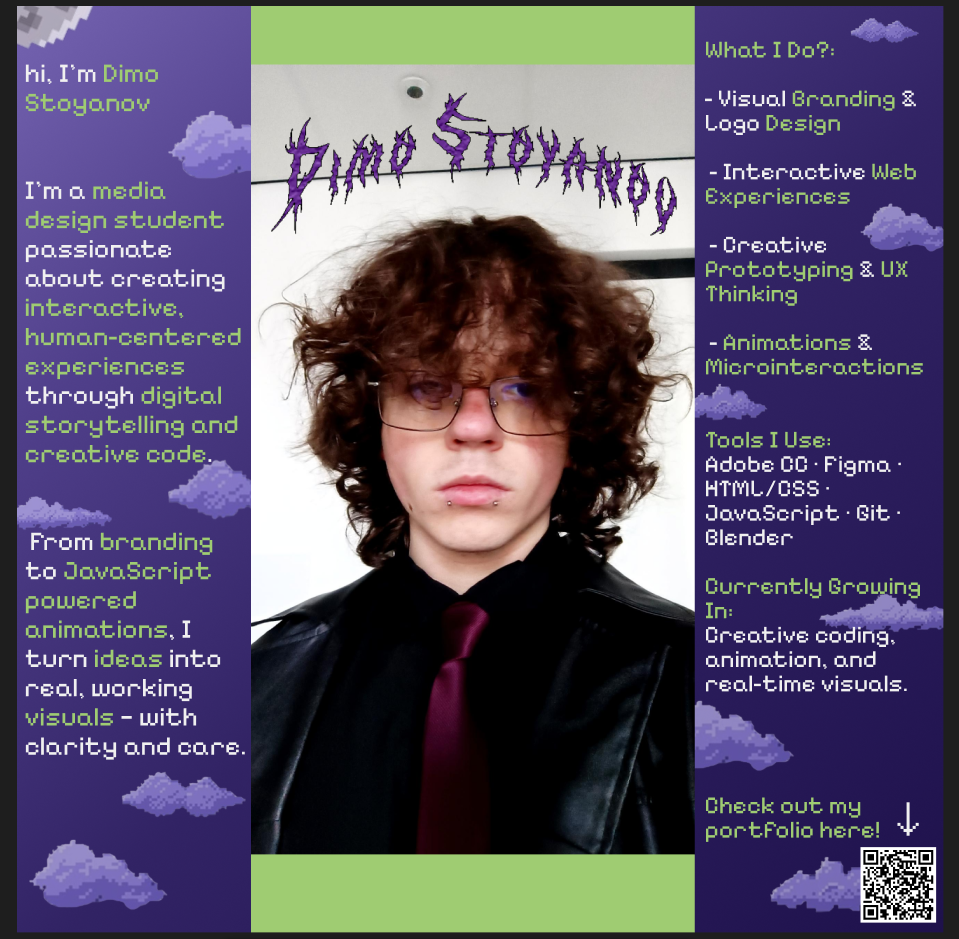
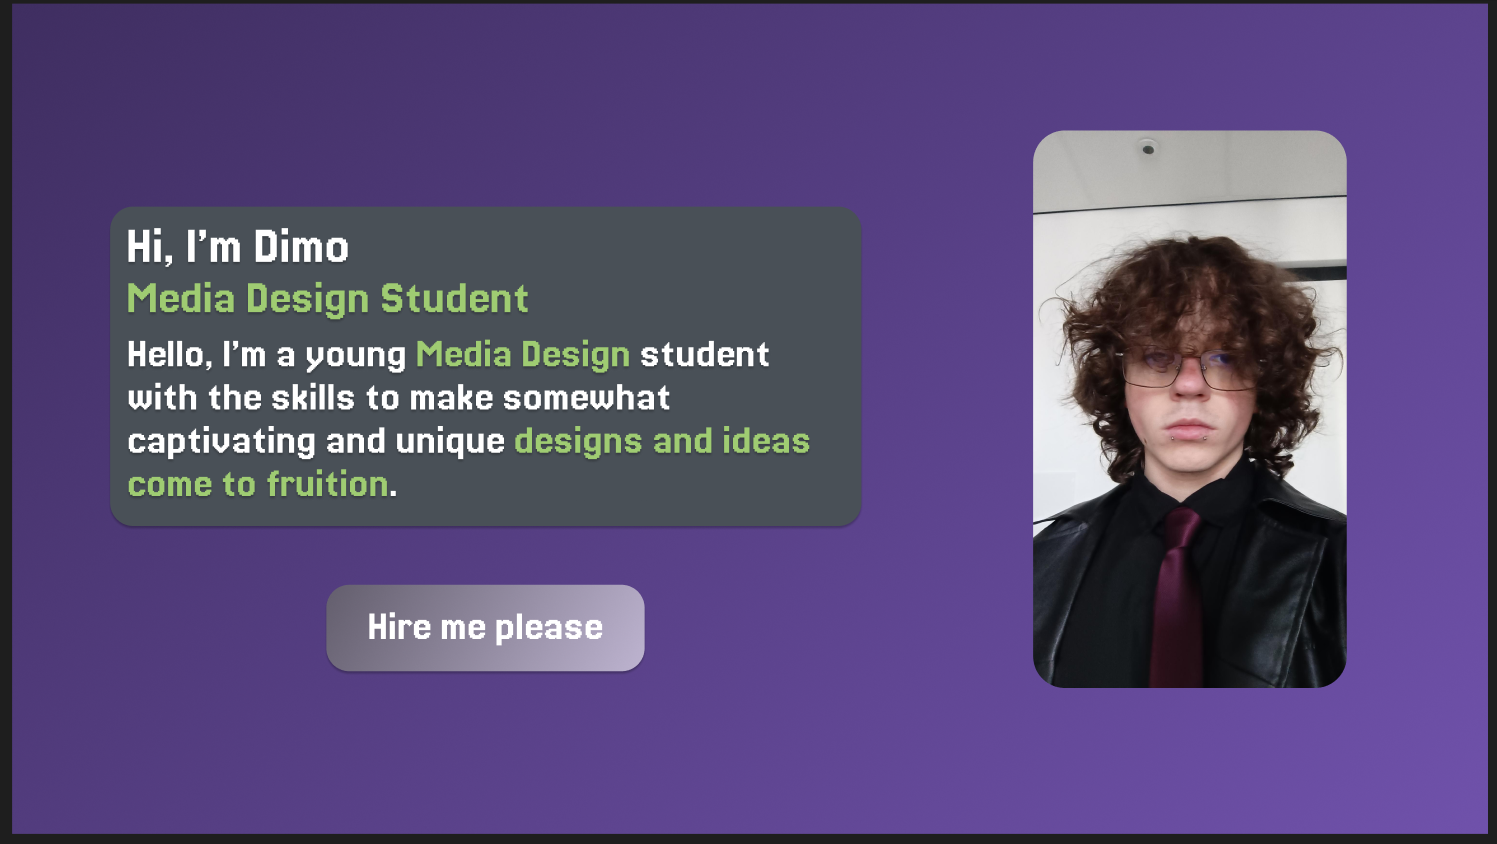
Personal “Hire Me” Landing Page
The last exercise was to design a personal landing page that would serve as a bold introduction and clearly show that I want to be hired. I focused on clear calls-to-action, eye-catching visuals, and a strong sense of my personal brand. The goal was to make the page stand out and leave no doubt about my intent and personality as a creative.
Landing page design to “get me hired”
Self-Reflection:
Designing this page made me think about target audience and how to communicate value quickly. It was a great exercise in direct communication and using design to guide a viewer’s eye. I learned how important it is to be intentional with every element, from the wording to the layout and color.
Arcade Survival Game - Iterative Design
My process for this game was built around iteration. I started with a simple prototype—just movement and basic shooting—then expanded to waves, collectibles, UI, and polish. After every playtest, I identified what needed to change (sometimes bugs, sometimes balance, sometimes clarity) and made focused improvements. I explored design tools, like Figma and pixel art editors, to sketch UI and visual ideas before building them in Godot. This helped me quickly test different layouts for the health bar and pause menu. Iteration was especially important for balancing enemy speed, wave timing, and the feel of controls. Each change was tested in context, sometimes resulting in surprising improvements.
Self-Reflection:
I learned that real progress doesn't happen in a straight line—sometimes I needed to redo or even scrap features. Rapid iteration, playtesting, and asking for honest opinions was more productive than trying to get everything right on the first try. I also enjoyed seeing the game evolve as I worked, and I now appreciate how much better the final product gets when you aren't afraid to keep improving it.
Throughout our branding project, I actively participated in client meetings where we presented our designs and received feedback from Maddie Jane. This experience helped me understand how to communicate professionally with a client, take constructive criticism, and use feedback to improve a design.
Self-Reflection: This project taught me how to present my work professionally and how to ask the right questions to understand a client's needs. It was a valuable experience in learning how to collaborate within a team and make design decisions based on real feedback.
Photoshoot Organization
I helped plan and execute a photoshoot for Maddie Jane's branding visuals. My role included coordinating logistics and capturing behind-the-scenes video proof to document the process.
Self-Reflection: Organizing the photoshoot was a new challenge for me. It showed me that design isn't just digital—visual identity is also shaped through photography and art direction. Seeing the final photos made me appreciate how much preparation and teamwork go into a successful visual project.
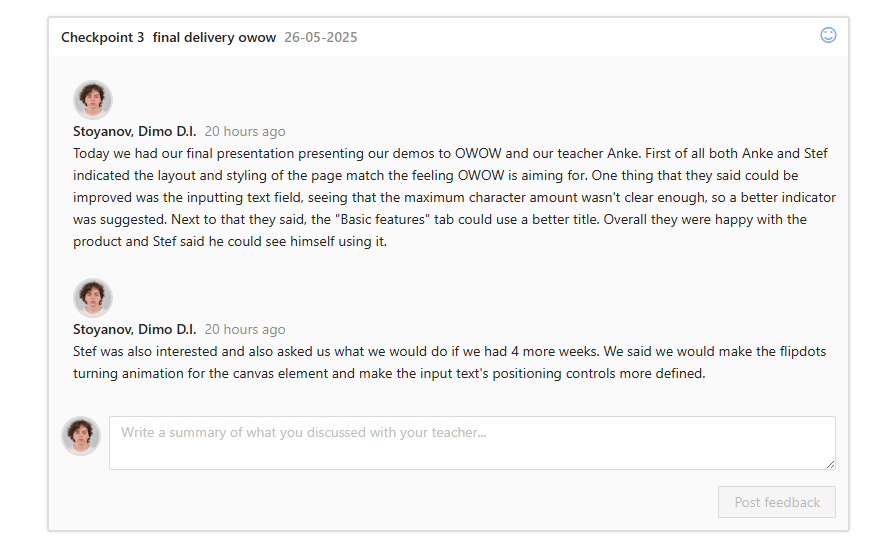
User Testing & Professional Feedback (Flipdot Simulator Development Part)
To ensure the Flipdot Board Simulator met a professional standard, I conducted user tests and gathered feedback from classmates about the usability, clarity, and overall experience. Below you can see the summary of the results and direct quotes from the testers:
Self-Reflection:
Collecting and analyzing this feedback made me much more aware of the importance of usability, clarity, and first impressions. The user tests highlighted things I missed as a developer, and helped me plan real improvements based on what users actually experience. Listening to testers—especially when their first impression is confusion—showed me the value of professional feedback in refining digital projects.
Arcade Survival Game - Professional Practice
I approached this project with a strong focus on professional standards in both development and presentation. I set project goals, tracked tasks, and made sure all code was well-commented for clarity. I regularly shared progress updates with friends and teachers and sought structured feedback, treating them as stakeholders to simulate a real-world workflow. I also practiced presenting the game, explaining not just how it works, but why I made certain decisions—like using invincibility frames or limiting the number of UI elements for readability.
Self-Reflection:
Treating my teachers and classmates as stakeholders forced me to be clearer in both my coding and feature implementation. I realized that good technical work isn't enough. Explaining my reasoning and being open to feedback made the whole process feel more professional. This approach will definitely help in future group and personal projects or client work.
Seeking Feedback & Iteration
I made adjustments to logos, stylescapes, and website elements based on feedback from my teachers and client. Throughout my process, I frequently asked my teachers whether the exercises or portfolio updates were going in the right direction and proactively sought suggestions for improvement. Whether it was a design iteration or a new interactive element, I used this feedback to refine my work, ensuring better clarity and quality in my final products.
Self-Reflection:
Receiving constructive feedback emphasized that design is inherently an iterative process. I learned that revisions aren't signs of failure but opportunities for growth. By proactively asking questions and reflecting critically on my work, I identified weaknesses early, allowing me to improve and deliver stronger solutions across multiple projects.
Independent Learning and Decision Making
Throughout the semester, I actively expanded my knowledge in JavaScript, exploring features and methods I hadn't used before. Through coding exercises, interactive web challenges, and specifically the Flipdot board simulator project, I enhanced my skills significantly. I learned how to implement canvas-based animations, develop interactive UI components, and apply advanced image-processing techniques using JavaScript. My approach involved self-guided research, extensive use of online resources, and regular trial and error to solve technical and visual problems. Seeking additional feedback from teachers and peers further refined my approach and understanding.
Self-Reflection:
Improving my JavaScript abilities gave me greater confidence in my technical skills, enabling me to approach coding problems more strategically and creatively. This experience taught me how to effectively seek resources, ask precise questions, and apply solutions independently. It significantly increased my ability to take initiative and overcome technical obstacles with minimal guidance.
Choosing My Profile
I chose to specialize in the Media Creation profile for my second year. Throughout my projects, I realized my passion lies in merging technical execution with visual storytelling. Media Creation offers me an environment where I can further explore interactive visuals, creative coding, and real-time digital experiences. It aligns perfectly with my interest in creating media products that are both expressive and technically sound.
Self-Reflection:
Selecting Media Creation felt like a natural decision because it matches my strengths and the direction in which I want my skills to evolve. It reflects my growing confidence and enthusiasm for creating digital experiences that balance creativity and functionality, motivating me to continue learning and experimenting with purpose.
Arcade Survival Game - Reflection & Growth
Throughout the project, I took active steps to guide my own learning. I made playtests and feedback sessions, even when the game was still rough, because I knew it would help me improve. I reflected on both what went well (creative problem solving, responsive UI) and what didn't (some overcomplicated code, early scope creep). When faced with bugs or setbacks, I learned to break problems into manageable steps and ask for help when needed—whether from online communities, documentation, or peers. I also set aside time after every major milestone to document lessons learned and set goals for the next phase.
Self-Reflection:
I discovered that growth comes from honest reflection and being open to criticism. Pushing myself to finish the game, ask for feedback, and iterate (even when it was hard) helped me get more from the experience than just a finished product. It also made me more confident in taking the lead on future projects and in trusting my ability to learn as I go.